この記事はお役に立ちましたか?
もしこの記事が一つでもセキュリティリスクの明確化に役立ったのであれば、恩恵を受けそうな他の人々と共有することを検討してください😎
⬇️⬇️⬇️⬇️⬇️

This is an instruction guide on how to add a Trust Line to your XRPL and how to activate it in order to receive the Trust Asset (IOU).
For information on the XRPL Trust Line support on D’CENT Wallet, please refer to the past announcement.
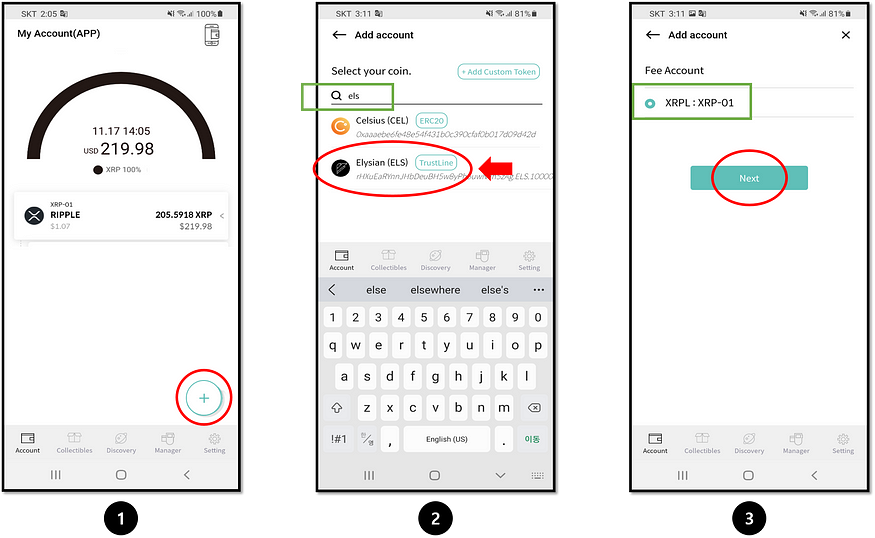
1. Click on the (+) icon and search for the name of the Trust Line you’d like to add.
2. For example, we will add Elysian (ELS). Search for ELS and click on the Elysian (ELS) Trust Line from the list.
3. Select your XRP account to set it as the Fee Account. Click ‘Next’ to continue.

4. You can label your account or set it as default. Click ‘Create’ to add this Trust Line.
5. The Trust Line added should show up under the XRP account.
Remember that just adding a Trust Line does not mean you can receive the Trust Asset (IOUs) to this account. You must first set (activate) the Trust Line before you can receive funds.
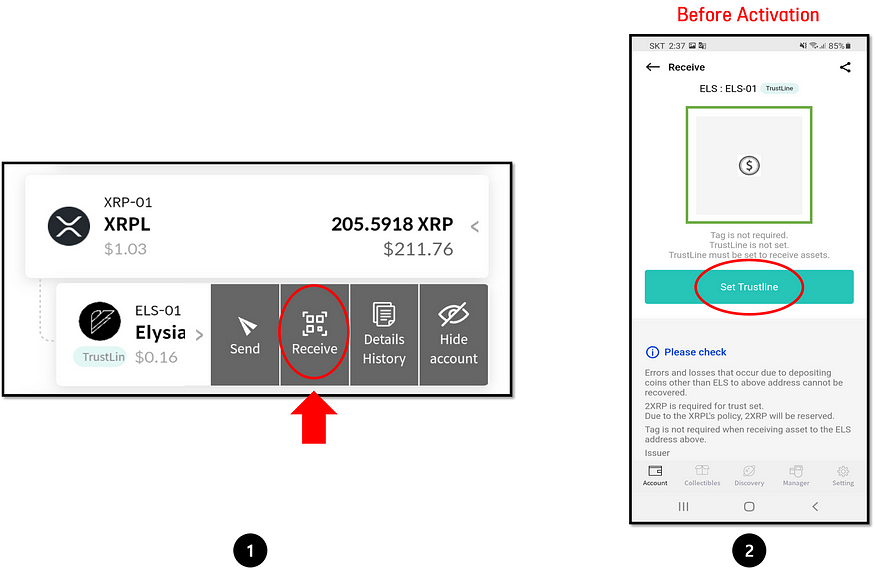
1. Click on the Trust Line account and click on the ‘Receive’ button.
2. Notice that before activation, the address is not displayed. Click on ‘Set Trustline’ to start the activation.
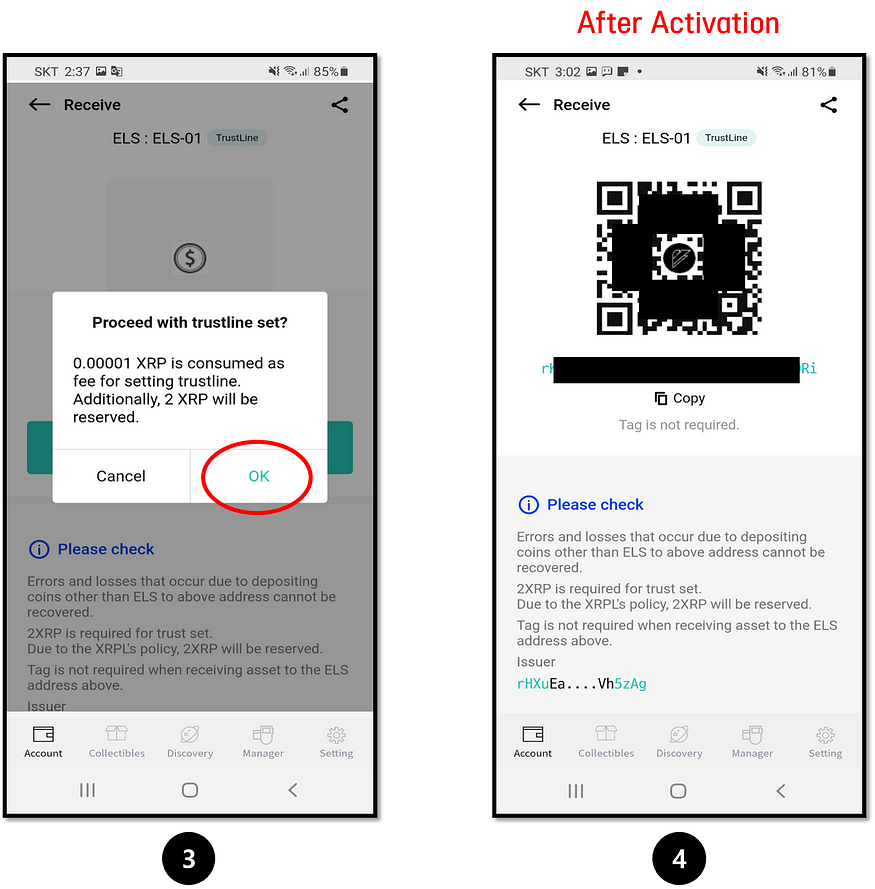
3. Note that setting(activating) a Trust Line will reserve 2 XRP (at the time of writing). To activate the Trust Line, click on the ‘OK’ button.
4. When the Trust Line is activated, the account will display the address.
この記事はお役に立ちましたか?
もしこの記事が一つでもセキュリティリスクの明確化に役立ったのであれば、恩恵を受けそうな他の人々と共有することを検討してください😎
⬇️⬇️⬇️⬇️⬇️
販売業者:株式会社 IoTrust (アイオートラスト)
代表責任者:白相洙 (ペク・サンス)
事業者登録番号:219-86-00705
通信販売業:第2021ソウル江南-006362
電話番号:+82-2-1833-4022 (代表)
電話受付時間:10:00 - 17:00 (土・日・祝日を除く)
Eメールアドレス:contact@iotrust.kr
本社所在地:〒06056 韓国ソウル市江南区宣陵路747、三成堂ビル 7F
© 2025 IoTrust All rights reserved7
送料は、最終決済画面で確認することができます。
