この記事がお役に立てれば幸いです。
記事の内容を共有いただくのにほんの数秒で済みますが、作成には20時間以上もの時間を費やしました。多くの方に役立つ情報として、ぜひシェアいただけると嬉しいです。 🚀

This is a guide for moving assets from the Ethereum Network to the Polygon Network using the D’CENT Wallet. (Reference: How to use Polygon bridge)
The D’CENT Mobile App’s dapp browser (Discovery Tab) supports both Ethereum and Polygon networks, this allows moving assets between the two networks through the dapp browser.
Discovery is a browsing function that allows you to use blockchain-based decentralized app (DApp) services. Since all dapp services, including Polygon Bridge, are not operated by D’CENT, you should seek assistance from each dapp service operator for any questions you may have while using the dapp service. Also, it is very important for users to understand that there is a risk of financial loss when using the dapp service, and the user is responsible for all risks that may occur while using the service.
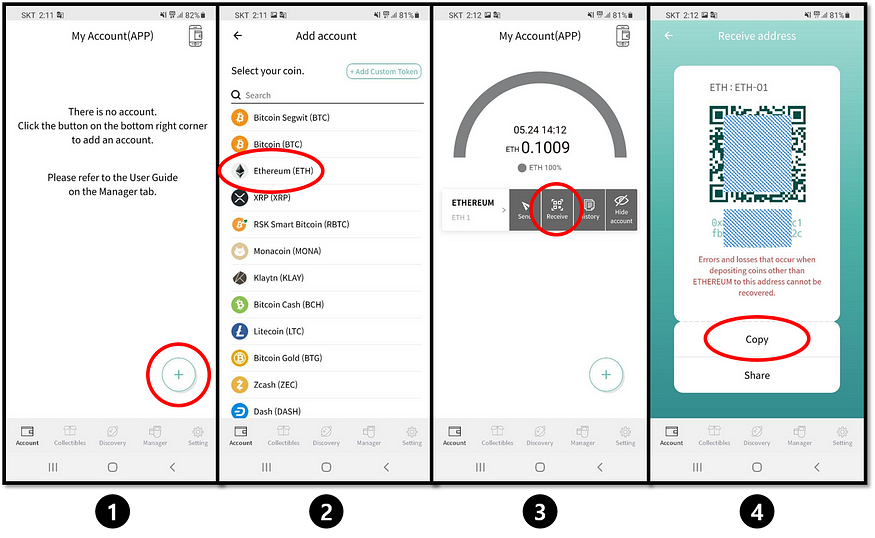
1) From the main screen, press the (+) button to create an Ethereum account
2) Select Ethereum to add
3) From the main screen, view the Ethereum address (press Receive button)
4) Copy the Ethereum address and receive ERC20 assets to this account.
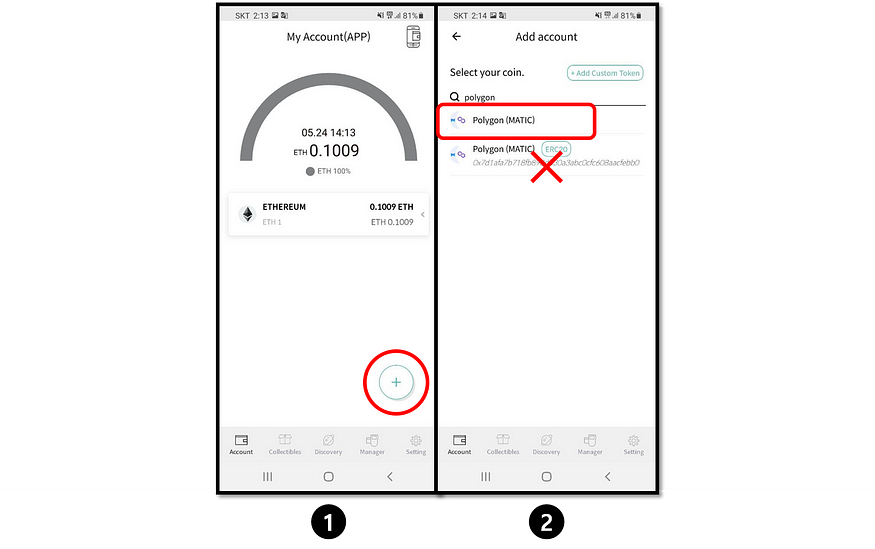
1) From the main screen press (+) button to add a Polygon (mainnet) account
2) Search for “Polygon” and choose Polygon (MATIC)
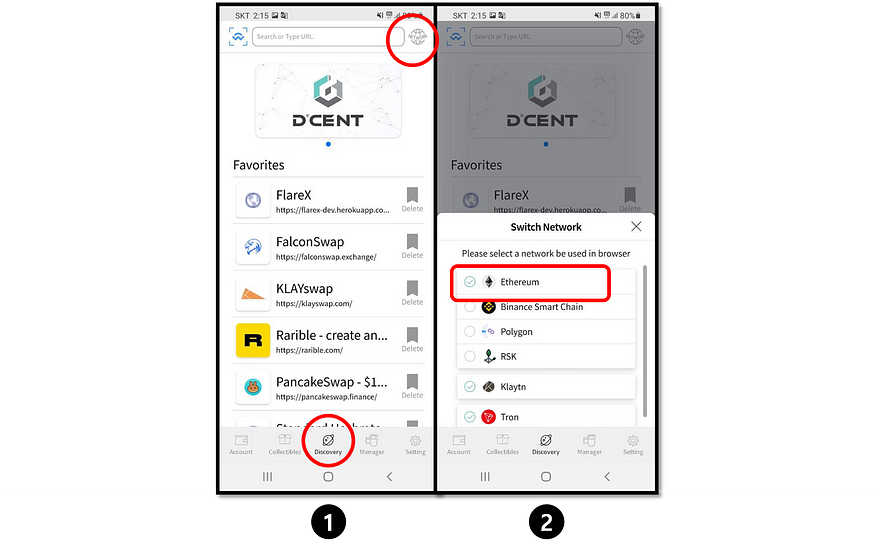
1) From the Discovery Tab, click on the network icon located at the top-right
2) Set the network to Ethereum
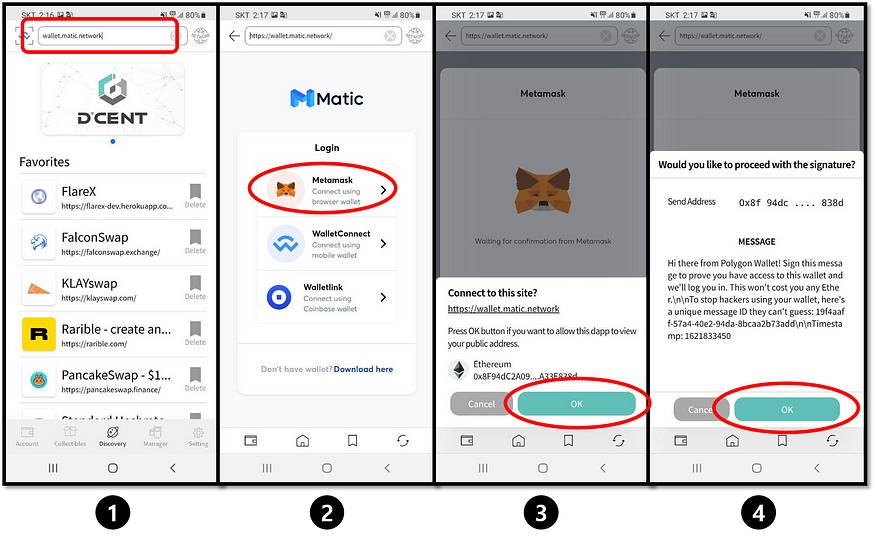
1) From the discovery tab, enter the following URL for Polygon bridge site: https://wallet.matic.network
2) At the bridge site, select Metamask as a wallet to login with
3) Continue by clicking OK button
4) Site login will require a signature. Click OK and authenticate(sign) with a fingerprint or PIN
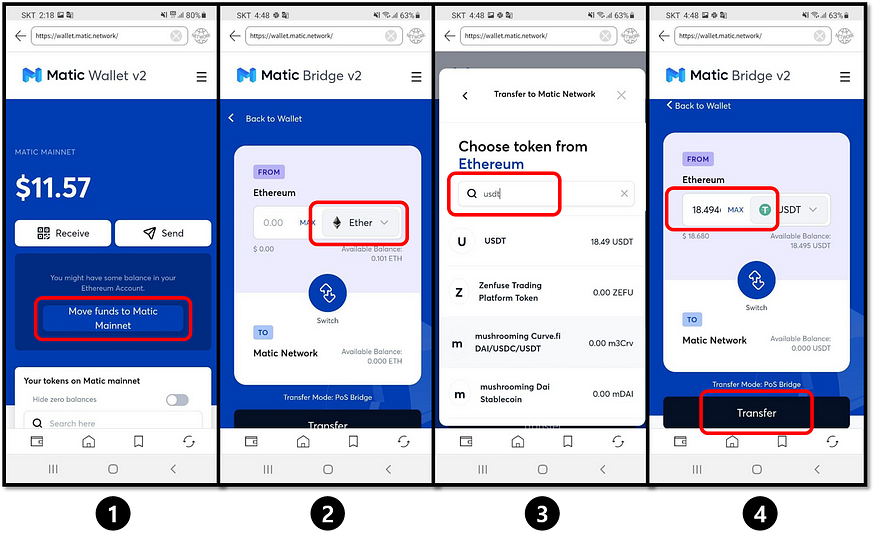
1) Click on Move funds to Matic Mainnet button
2) Press “Ether” button to select an asset to transfer
3) Search for an asset to transfer (ie: USDT)
4) Enter transfer amount and press Transfer button
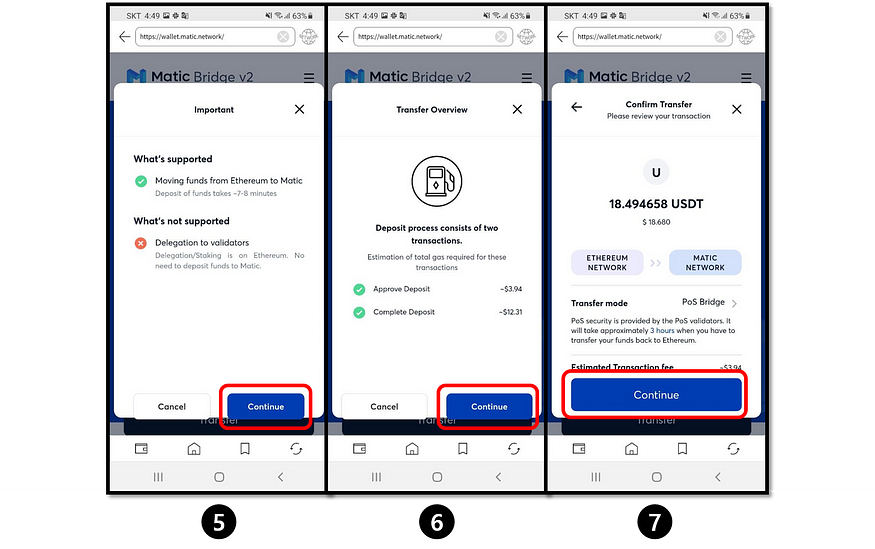
5) Press Continue to proceed
6) Review the fee requirement and press Continue to proceed
7) Press Continue to proceed
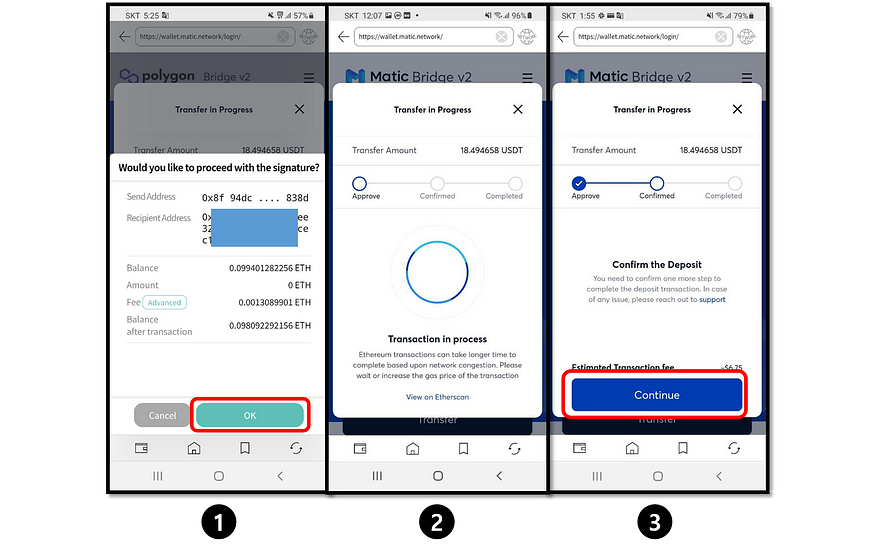
1) Click OK to proceed and authenticate(sign) with a fingerprint or PIN
2) Wait for the transaction to complete
3) Press Continue to complete
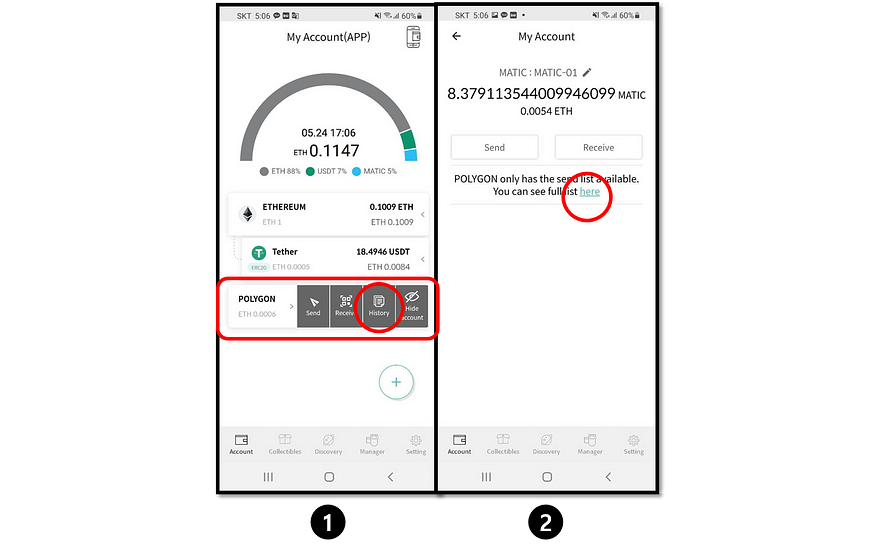
1) On your Polygon (mainnet) account, press History button
2) Press here to see the details of the transactions
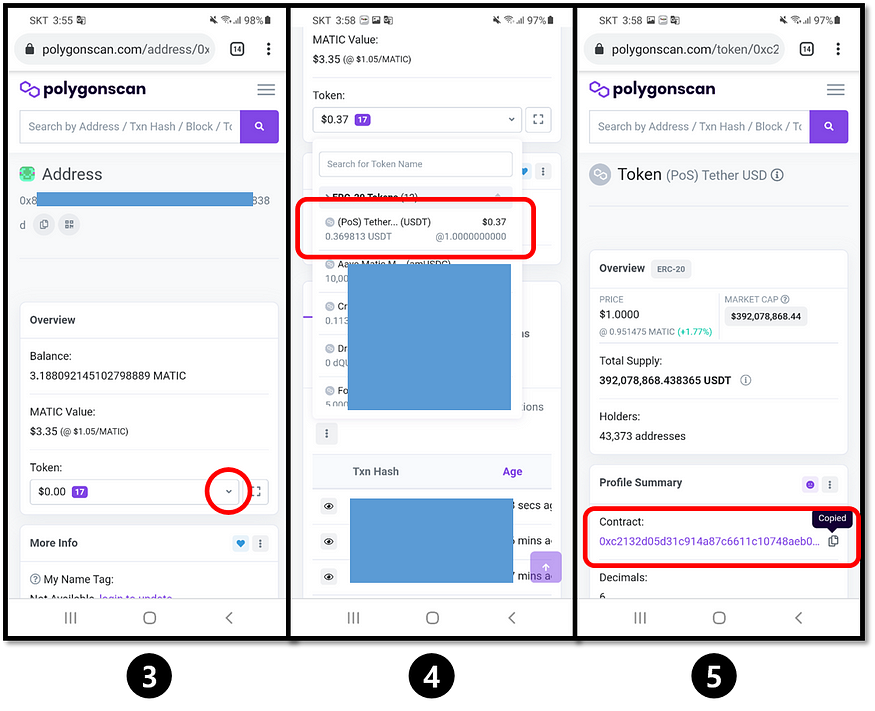
3) From the external site, click on the Token list
4) Click on USDT from the list
5) Copy the contract address
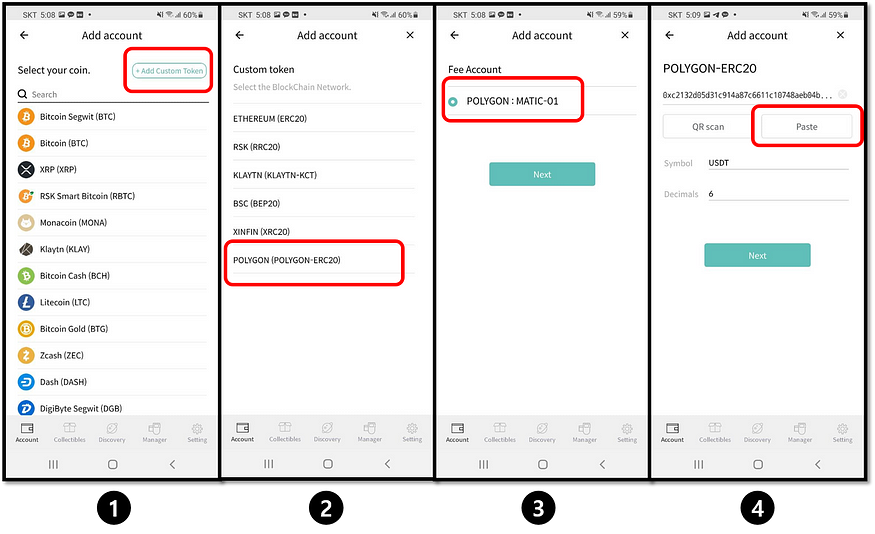
1) From D’CENT Wallet, click on Add Custom Token button
2) Choose (POLYGON-ERC20) as the network
3) Choose your POLYGON MATIC as the linking gas(fee) account
4) Press the Paste button to paste in the contract address which was copied from STEP 7 above. Press Next and POLYGON based USDT token account will be created
この記事がお役に立てれば幸いです。
記事の内容を共有いただくのにほんの数秒で済みますが、作成には20時間以上もの時間を費やしました。多くの方に役立つ情報として、ぜひシェアいただけると嬉しいです。 🚀