Did you find this article helpful?
Sharing it takes less than 20 seconds, but we spent over 20 hours crafting it to bring you valuable insights. Help others by spreading the knowledge! 🚀
This is an instruction guide on how to add a Trust Line to your XRPL and how to activate it in order to receive the Trust Asset (IOU).
For information on the XRPL Trust Line support on D’CENT Wallet, please refer to the past announcement.
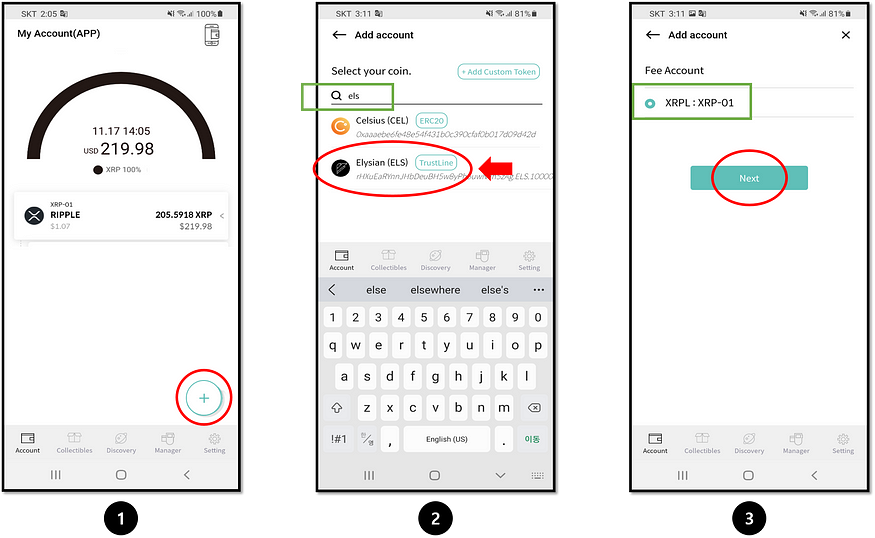
1. Click on the (+) icon and search for the name of the Trust Line you’d like to add.
2. For example, we will add Elysian (ELS). Search for ELS and click on the Elysian (ELS) Trust Line from the list.
3. Select your XRP account to set it as the Fee Account. Click ‘Next’ to continue.
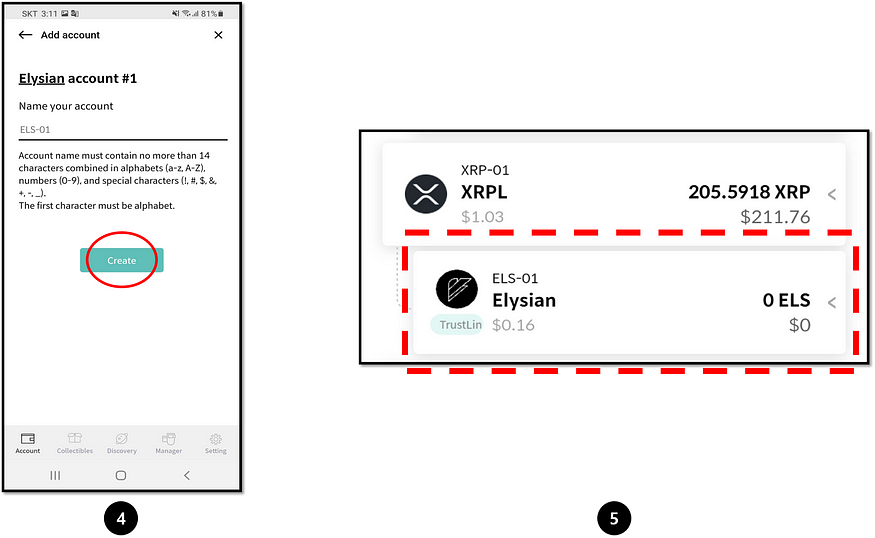
4. You can label your account or set it as default. Click ‘Create’ to add this Trust Line.
5. The Trust Line added should show up under the XRP account.
Remember that just adding a Trust Line does not mean you can receive the Trust Asset (IOUs) to this account. You must first set (activate) the Trust Line before you can receive funds.
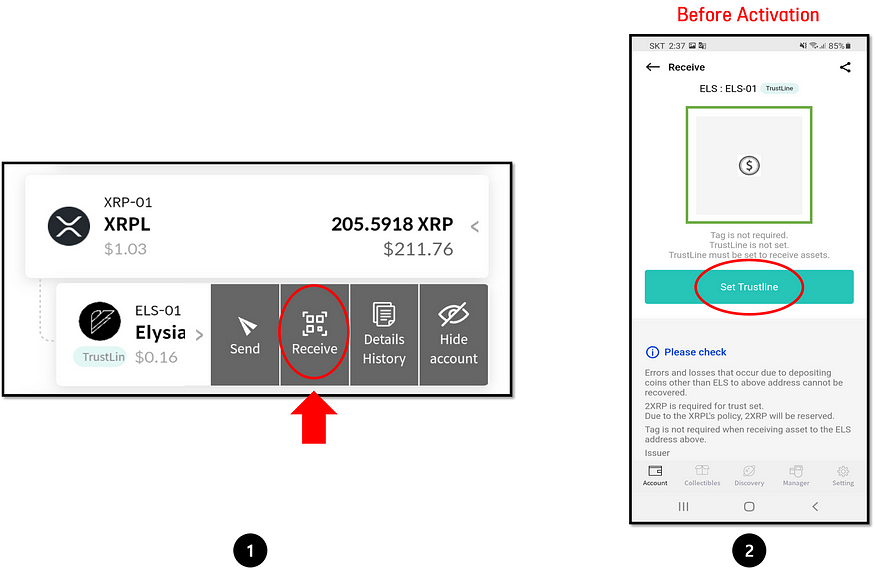
1. Click on the Trust Line account and click on the ‘Receive’ button.
2. Notice that before activation, the address is not displayed. Click on ‘Set Trustline’ to start the activation.
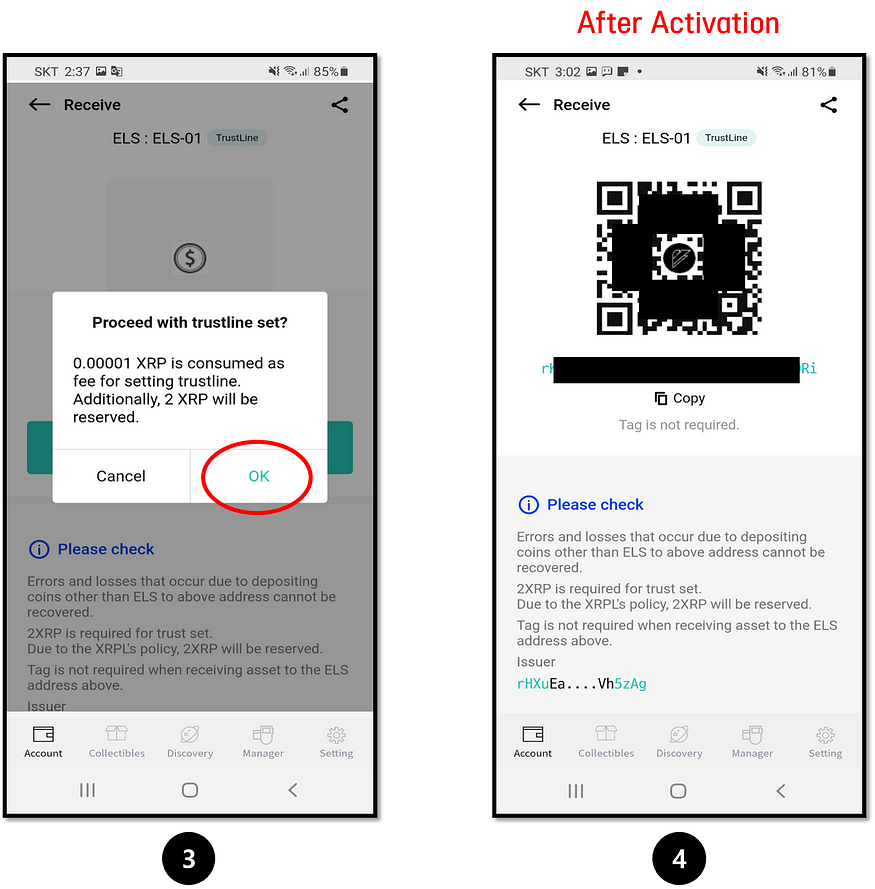
3. Note that setting(activating) a Trust Line will reserve 2 XRP (at the time of writing). To activate the Trust Line, click on the ‘OK’ button.
4. When the Trust Line is activated, the account will display the address.
Did you find this article helpful?
Sharing it takes less than 20 seconds, but we spent over 20 hours crafting it to bring you valuable insights. Help others by spreading the knowledge! 🚀